Rip Cuts vs. Cross Cuts: Table Saw Basics Explained
Whether you are building custom furniture or breaking down heavy sheets of MDF, understanding the difference between a rip cut and a cross cut is the foundation of safe and efficient table saw operation.
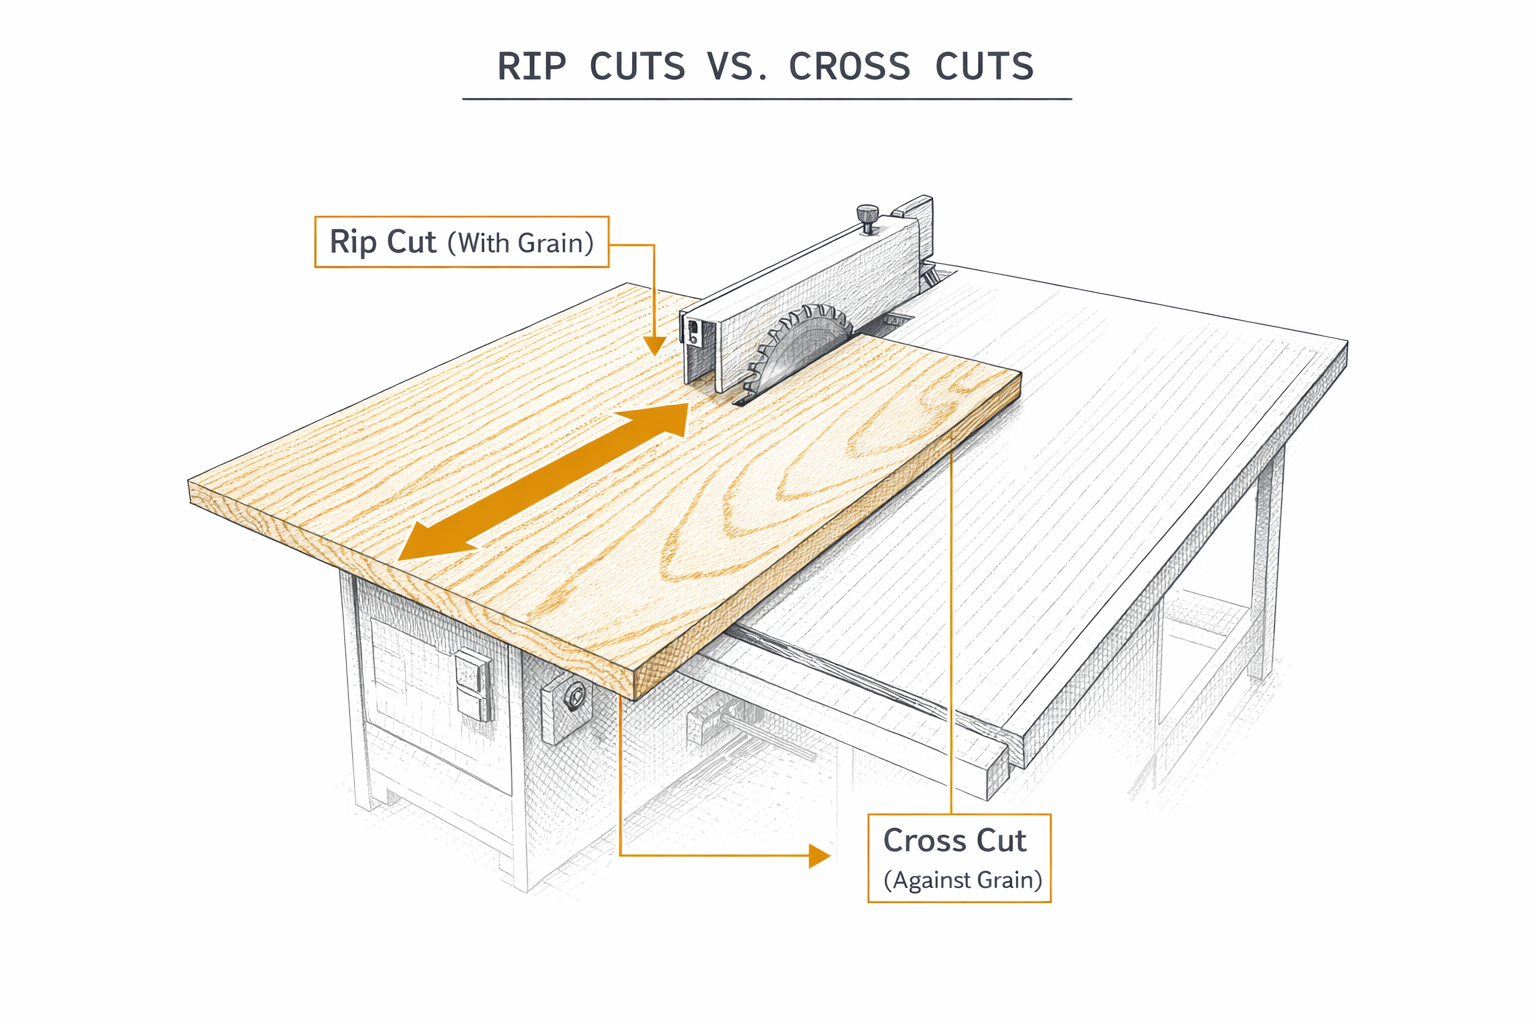
The Fundamental Difference
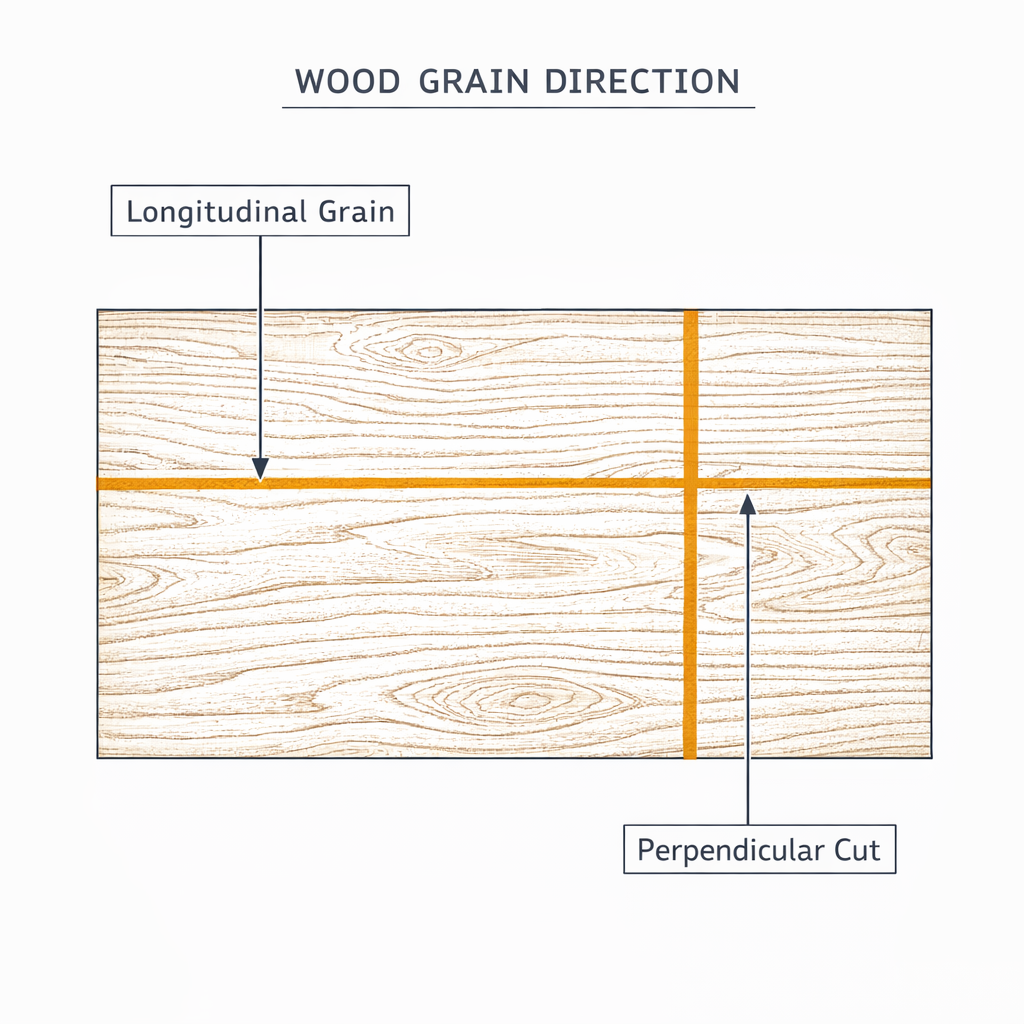
In traditional woodworking with solid lumber, the distinction between these two cuts is entirely based on the direction of the wood grain.
The Rip Cut
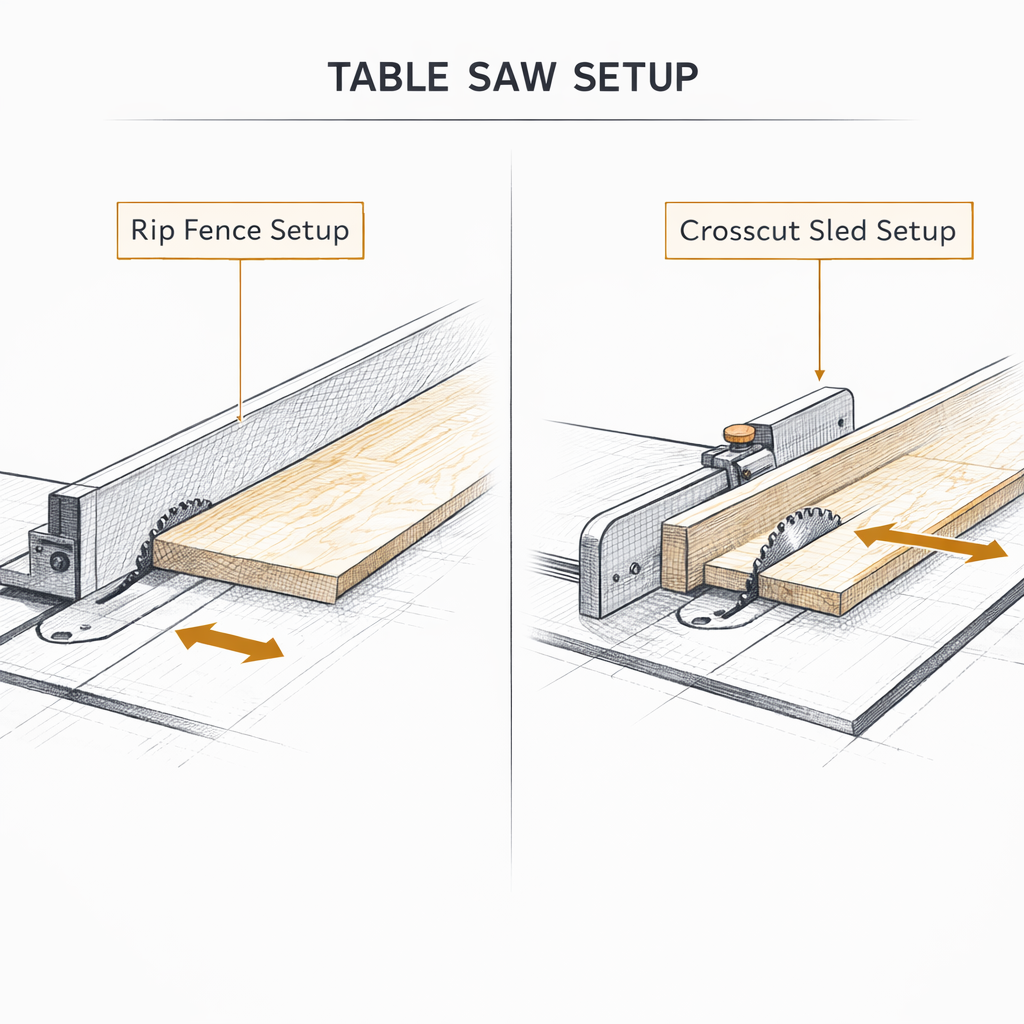
A rip cut is made parallel to the wood grain (along the length of the board). Because you are slicing between the wood fibers rather than severing them, this cut is usually easier for the saw. On a table saw, rip cuts are performed by sliding the board along the rip fence.
The Cross Cut
A cross cut is made perpendicular to the wood grain (across the width of the board). Here, the blade must violently chop through the wood fibers, which often requires a blade with more teeth to prevent splintering. On a table saw, cross cuts should never be made using the rip fence; instead, you must use a miter gauge or a crosscut sled for safety.
Applying this to Sheet Goods (MDF & Plywood)
When using our speaker box design software, you are likely working with manufactured sheet goods like MDF or Baltic Birch Plywood, rather than solid oak boards.
MDF has no grain. It is essentially pressed sawdust. Plywood has alternating grain layers. So how do rip and cross cuts apply here?
In the context of breaking down a 4x8 sheet, the terms change slightly to describe your workflow:
- Ripping Sheet Goods: This means cutting the large sheet down its longest dimension into manageable, long "strips".
- Crosscutting Sheet Goods: This means taking those long strips and chopping them into the smaller, final rectangular panels you actually need.
Why Cut Direction Matters for Workflow
If you randomly cut parts out of a sheet of plywood like a puzzle, you will constantly have to move your heavy table saw fence back and forth. This leads to exhausting work and measurement errors.
The most efficient workshop strategy is to group your cuts. First, set your fence once and rip the entire sheet into long strips of the same width. Then, move to a crosscut sled and chop those strips into their final lengths.
Automate Your Table Saw Workflow
Do not waste time trying to figure out the most efficient cutting order. Enter your panel dimensions into our free cutlist optimizer. Our algorithm is specifically designed for real-world workshops. It organizes your parts into "strip-aware" layouts, minimizing fence adjustments and clearly separating your rip cuts from your cross cuts.